ServerOwl™ How to Monitor Your Website's Server?
Last modified: April 21, 2019
ServerOwl offers you the ability to monitor your website's server and alert you via email and SMS when your server is no longer responding appropriately. It does this by monitoring your website's traffic and when the predicted amount of traffic drops below about 10% for any given two minute period, it will start investigating your website to identify the reason why.
This method of detecting problems only when your server is no longer responding to the expected traffic can identify periods where your server might be actually running, but not running correctly, or is overloaded during peak periods or a Denial of Service (DoS) attack. Where similar website monitoring applications will poll your server, it still might be responding with the underlining HTML data, but be broken from an internal error, or just not handing the current demands. ServerOwl offers you the ability to view the real-time messages being received from your server, so you can always see what had happened in the event of an alert.
How to Setup ServerOwl to Monitor Your Server
Once you have created an Account or Campaign, you can then attach a Server to either one of those objects. Before being able to create a server, your Account must have an agreed payment method. If your Server Management area has a similar error as Figure 1 below, then work your way through to your Account and select a payment method as shown in Figure 2. And if your Account has no available payment methods, then move to your user profile and add an appropriate payment method as shown in Figure 3.

Figure 1

Figure 2

Figure 3
Once your Account has been setup with a valid payment method, when you access your Account or Campaign settings, you should now be able to select the server management option and be given a dialog input similar to Figure 4 below. In that dialog box, you should be able to set your server's name and health URL. The health URL is the page ServerOwl will query when trying to inspect what is going wrong with your website's traffic. This URL should point to a webpage that's available to the public and uses database queries to generate. Normally this URL is your website's homepage, as that's the most important page, but if your homepage is statically defined, then it might be a better idea to select a different page.

Figure 4
When you save your server's details, ServerOwl will attempt to verify access to your health URL. If there is any failure of that URL, you should receive an error telling you of the problem. There is also the ability to silence particular errors and to define the timeout period. If your server is inherently slow, then you'll receive numerous warnings that your server has failed to respond in the expected time. In this dialog, you can configure what is that expected timeout period or to block such warning altogether.
You can also configure which payment scheme you wish for this server. If you are just testing whether ServerOwl is the better option for you and want to only pay for what you use, then select the post-payment method. If however you are satisfied with ServerOwl and what to use it constantly, then the pre-payment method will offer you a discount. The pre-payment method will only be charged the night after you that option, so if you select the pre-payment method, you can still chose the post-payment method directly afterwards without being charged.
Server Billing
Once you have setup your server, you can see the estimated billing for your server in the account billing section as shown in Figure 5 below. This dialog will show you how many servers are attached to your account and the predicted billing amount and predicted billing date. You can check it at any time to see just what charges are going to be billed.
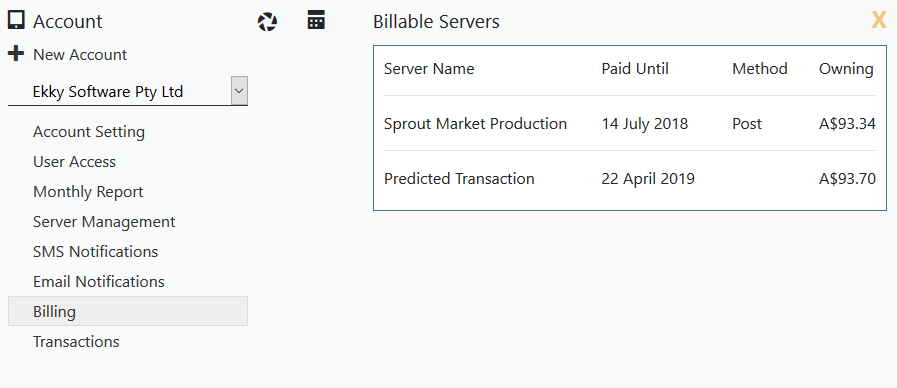
Figure 5
Comments (0)
Please Log In
X